Introduction:
Welcome to the delightful world of Sesame Street, where learning meets fun and excitement! In this article, we’ll guide you through the steps of creating an adorable Sesame Street cake that will surely be the highlight of any celebration. Whether you’re planning a birthday party for a young fan or simply want to bring some childhood nostalgia to your dessert table, crafting a Sesame Street cake is a fantastic idea that’s bound to impress both kids and adults alike.
Choosing the Right Design for Your Sesame Street Cake:
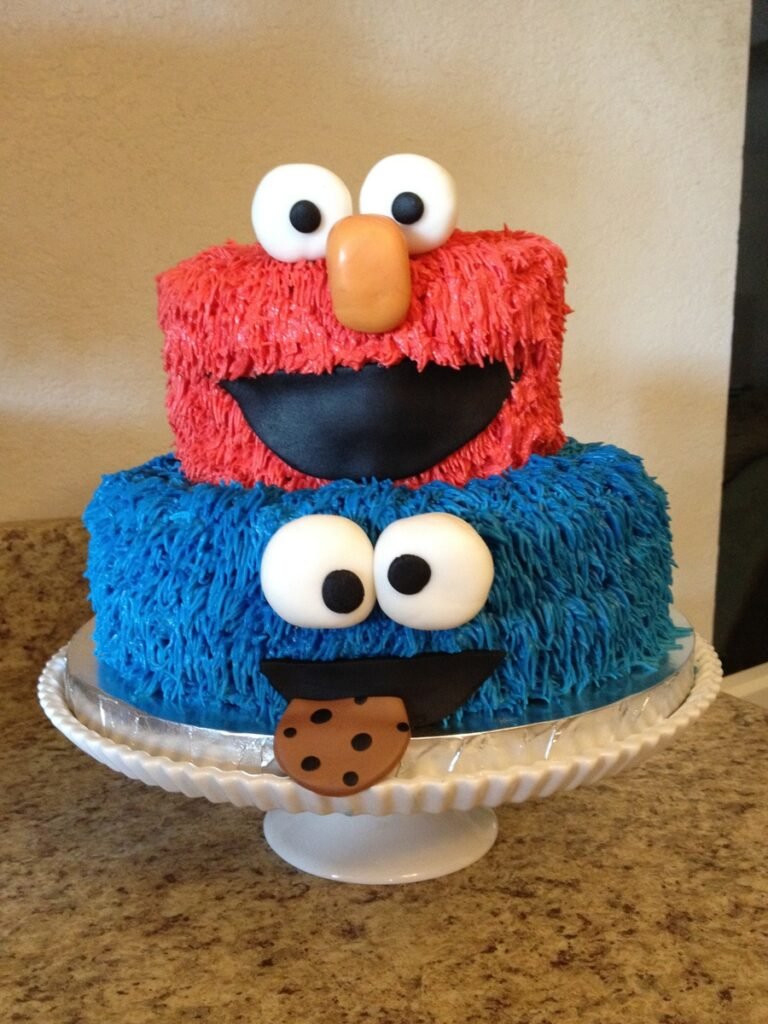
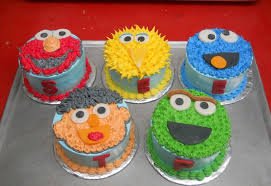
When it comes to designing your Sesame Street cake, there are several factors to consider to ensure it turns out as delightful as possible. Think about the age of the person you’re making the cake for, their favorite Sesame Street characters, and the overall theme of the event. Whether you opt for a classic design featuring Big Bird, Elmo, Cookie Monster, and friends, or decide to focus on a specific character, the key is to choose a design that resonates with the recipient and captures the essence of Sesame Street.
Ingredients You’ll Need:

Before you embark on your baking adventure, gather all the necessary ingredients to create your masterpiece. For the cake itself, you’ll need flour, sugar, eggs, butter, milk, baking powder, vanilla extract, and a pinch of salt. Additionally, you’ll require ingredients for the frosting, such as powdered sugar, butter, vanilla extract, and food coloring for decorating.
Preparing the Cake Layers:
Start by preheating your oven and preparing your cake pans. Mix the dry and wet ingredients separately, then combine them to form a smooth batter. Divide the batter evenly among the cake pans and bake until a toothpick inserted into the center comes out clean. Once baked, allow the cakes to cool completely before leveling them to ensure a flat surface for stacking.
Making the Frosting:
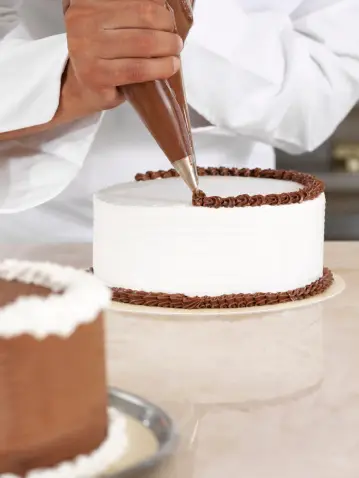
While your cake layers are cooling, it’s time to prepare the frosting. Whip together butter, powdered sugar, and vanilla extract until light and fluffy. For colorful decorations, divide the frosting into smaller portions and add food coloring to achieve the desired shades.
Assembling the Cake:

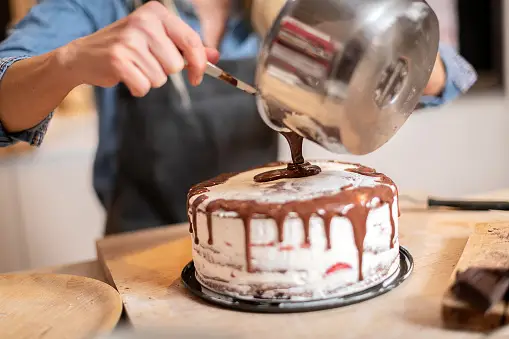
Once everything is prepared, it’s time to assemble your Sesame Street cake! Begin by layering the cake, spreading a generous amount of frosting between each layer. Use an offset spatula to smooth the frosting and create clean edges. Then, let your creativity shine as you decorate the cake with edible Sesame Street characters made from fondant or piped buttercream.
Tips for a Perfect Finish:

To ensure your Sesame Street cake looks as adorable as possible, here are a few tips to keep in mind. Chill the cake layers before frosting to prevent crumbs from mixing into the frosting. Use gel food coloring for vibrant hues that won’t alter the consistency of the frosting. And don’t forget to refer to reference images of Sesame Street characters for accurate designs.
Serving and Storing Your Sesame Street Cake:
Once your masterpiece is complete, it’s time to share it with friends and family! Serve slices of the cake at room temperature for the best taste and texture. Any leftover cake can be stored in an airtight container in the refrigerator for up to several days, ensuring it stays fresh for future enjoyment.
Conclusion:
Crafting an adorable Sesame Street cake is a delightful way to celebrate any occasion. By following these simple steps and letting your creativity shine, you can create a sweet treat that’s as charming as it is delicious. Whether you’re a seasoned baker or a novice in the kitchen, making a Sesame Street cake is sure to be a fun and rewarding experience that brings joy to all who see and taste it.
FAQs:
- How far in advance can I make a Sesame Street cake?
- We recommend making the cake layers and frosting a day in advance, then assembling and decorating the cake on the day of serving for optimal freshness.
- Can I use fondant instead of buttercream for decorating?
- Absolutely! Fondant is a great option for creating intricate designs and smooth finishes on your Sesame Street cake.
- How can I transport a decorated Sesame Street cakes safely?
- Place the cake on a sturdy cake board and secure it in a cake box to prevent any shifting during transport. Avoid placing the cake in direct sunlight or high temperatures to prevent melting or damage.
- Can I make a Sesame Street cakes without using artificial food coloring?
- Yes, you can use natural food coloring alternatives such as beet juice, turmeric, or matcha powder to achieve vibrant colors without artificial additives.
- How do I prevent the frosting from melting in warm weather?
- If serving the cake outdoors or in warm conditions, consider using a frosting recipe that’s less prone to melting, such as Swiss meringue buttercream. Keep the cake in a shaded area until ready to serve to minimize exposure to heat.
